

Connect ChatGPT to your Fortnox.
First, the connector needs to be activated on your Fortnox account via the marketplace, by you or your administrator. After that, you add it to ChatGPT, count on about five minutes.
Already know how it works? Add the address as an MCP app.
https://fortnox-chatgpt.sidcom.ai/mcp// step by step
Add the connector in ChatGPT and connect Fortnox
Done
Fortnox is added. Next, connect it to your Fortnox company.
Step 1 of 8
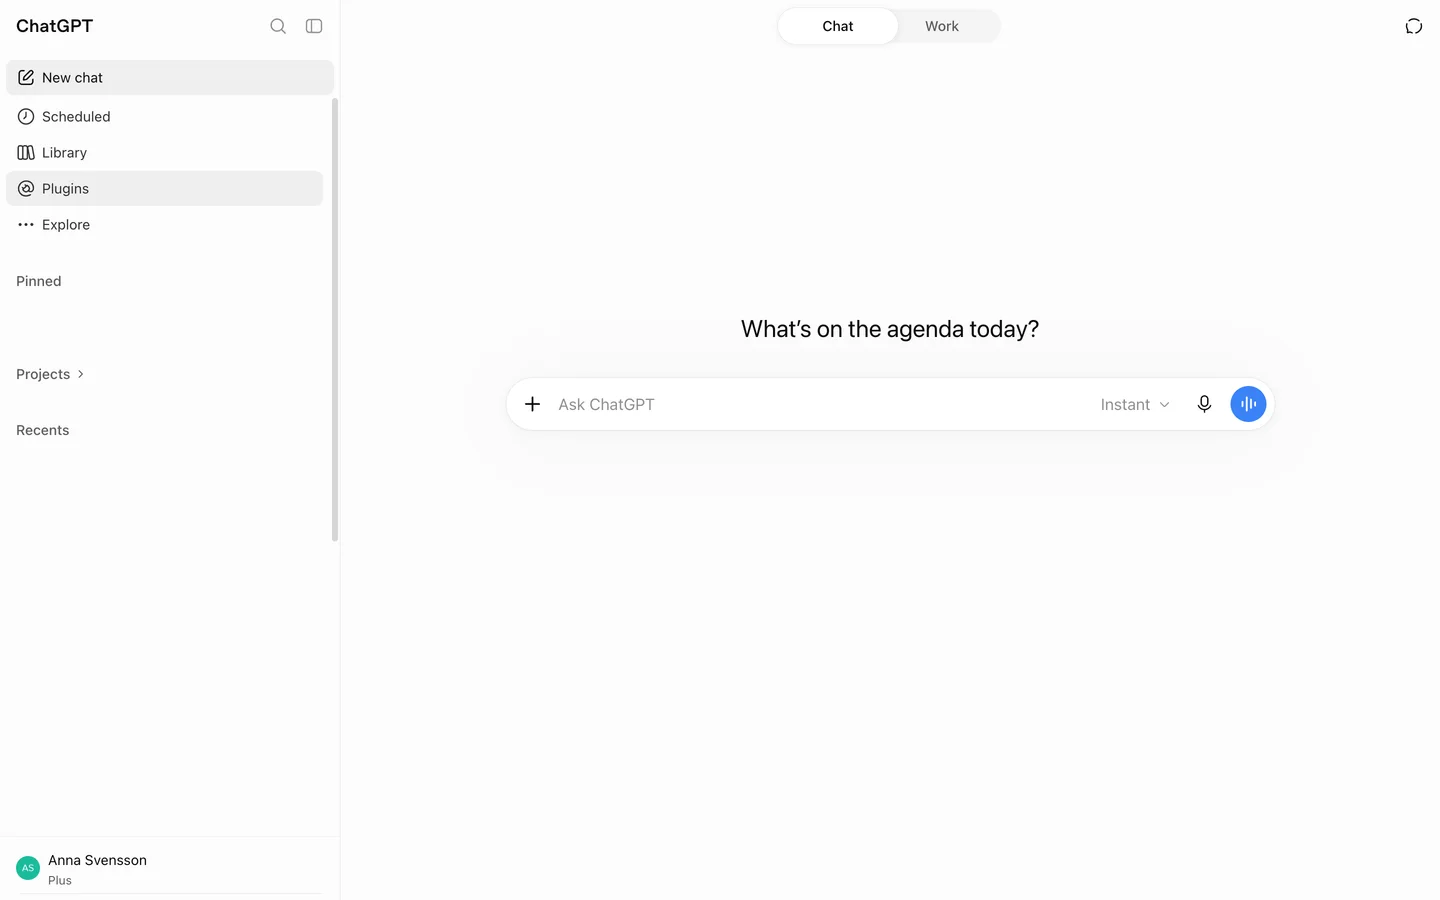
Open Plugins
Plugins is in the menu on the left, under Library.
ClickPlugins
Open Pluginschatgpt.com(opens in a new tab)No menu? Click the sidebar icon at the top left.
Stuck on this step?
There is no Plugins in my menu
The mobile apps do not have it. Open chatgpt.com/plugins in a browser on your computer instead.
Contact support about this step →Looks different on your screen?
Still stuck? Tell us which step and we will help you through it.
Step 2 of 8
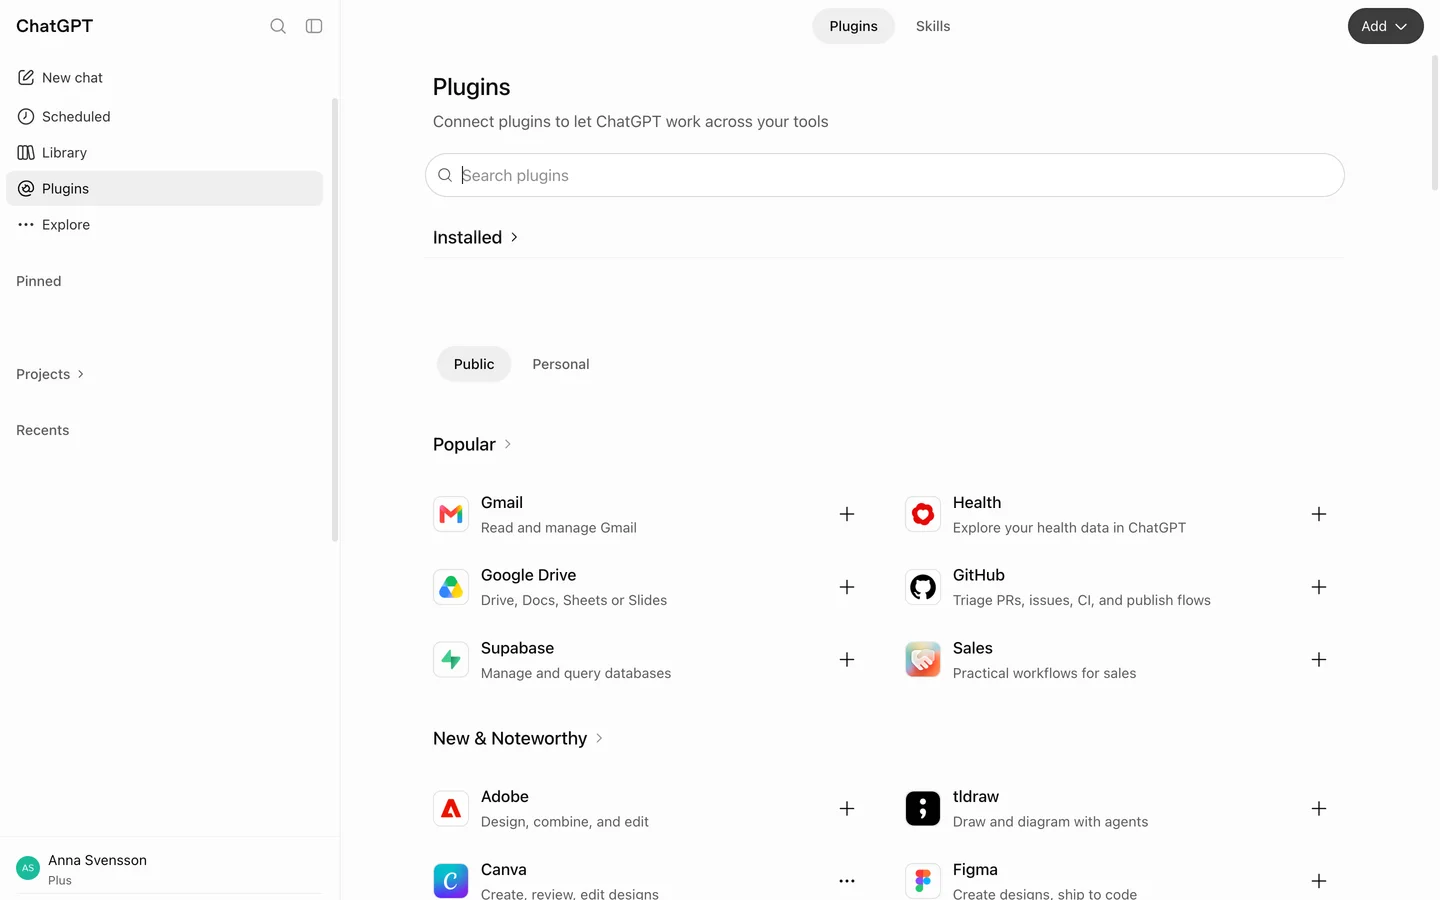
Click Add
Top right of the Plugins page.
ClickAdd
Stuck on this step?
Contact support about this step →Looks different on your screen?
Still stuck? Tell us which step and we will help you through it.
Step 3 of 8
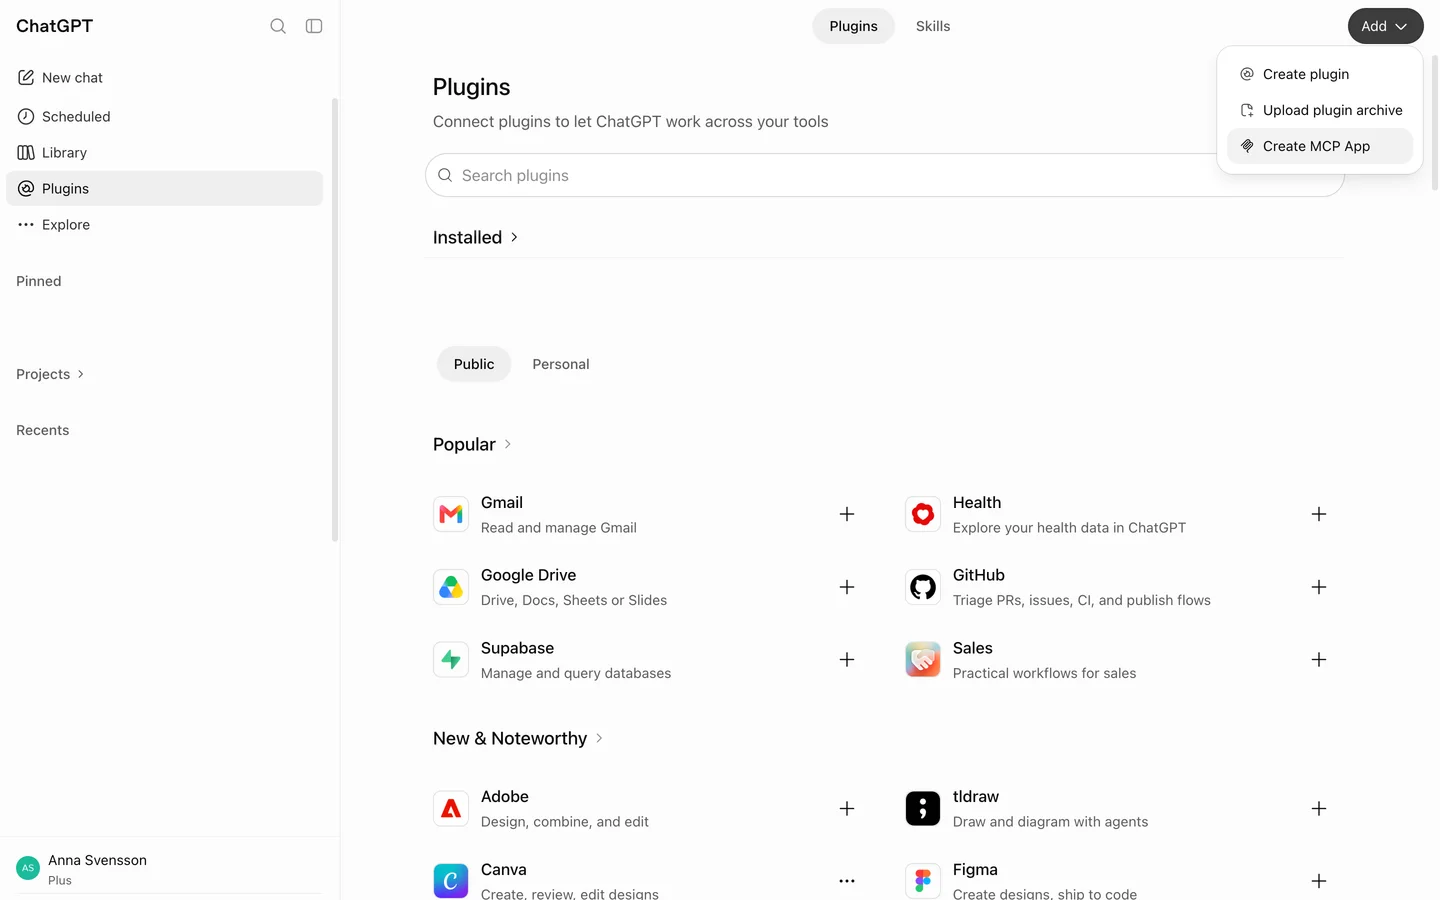
Choose Create MCP App
The Fortnox Connector is an MCP server, so pick this one, not Create plugin.
ClickCreate MCP App
Stuck on this step?
I do not see Create MCP App
On Business and Enterprise an administrator can turn off custom apps for the workspace. Ask your ChatGPT administrator to allow them, or to add the Fortnox Connector for everyone.
Contact support about this step →Looks different on your screen?
Still stuck? Tell us which step and we will help you through it.
Step 4 of 8
Name it
Anything you will recognise in a chat. Fortnox works well.
Type inName
Fortnox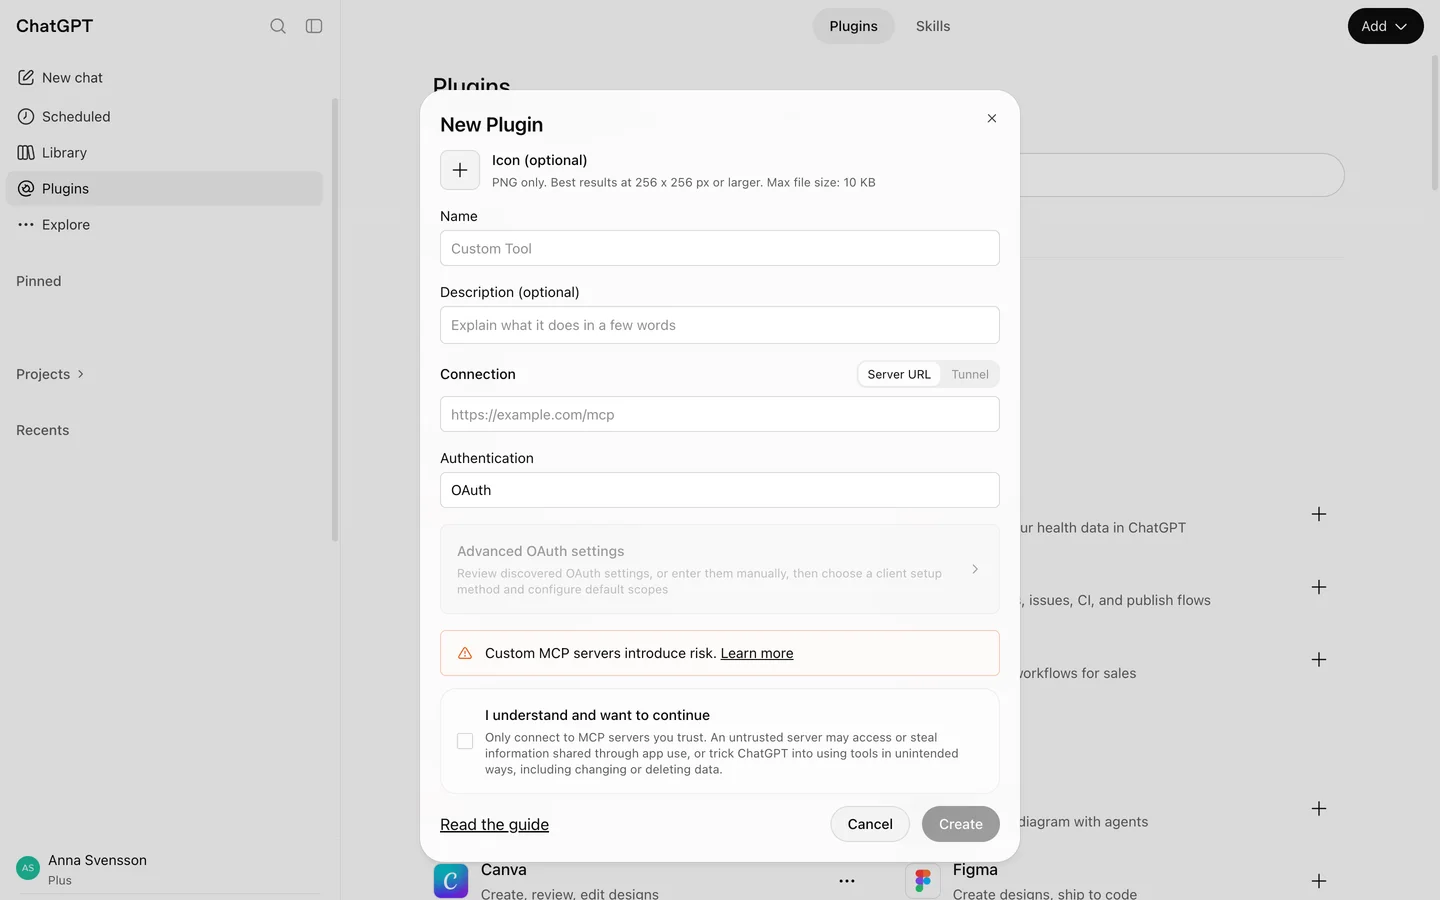
Stuck on this step?
Nothing happens when I click Create at the end
The name is already used by another plugin in your account. Pick another name, for example Fortnox 2, and try again.
Contact support about this step →Looks different on your screen?
Still stuck? Tell us which step and we will help you through it.
Step 5 of 8
Paste the server address
Keep Connection on Server URL and paste the address below.
Type inServer URL
MCP server addresshttps://fortnox-chatgpt.sidcom.ai/mcp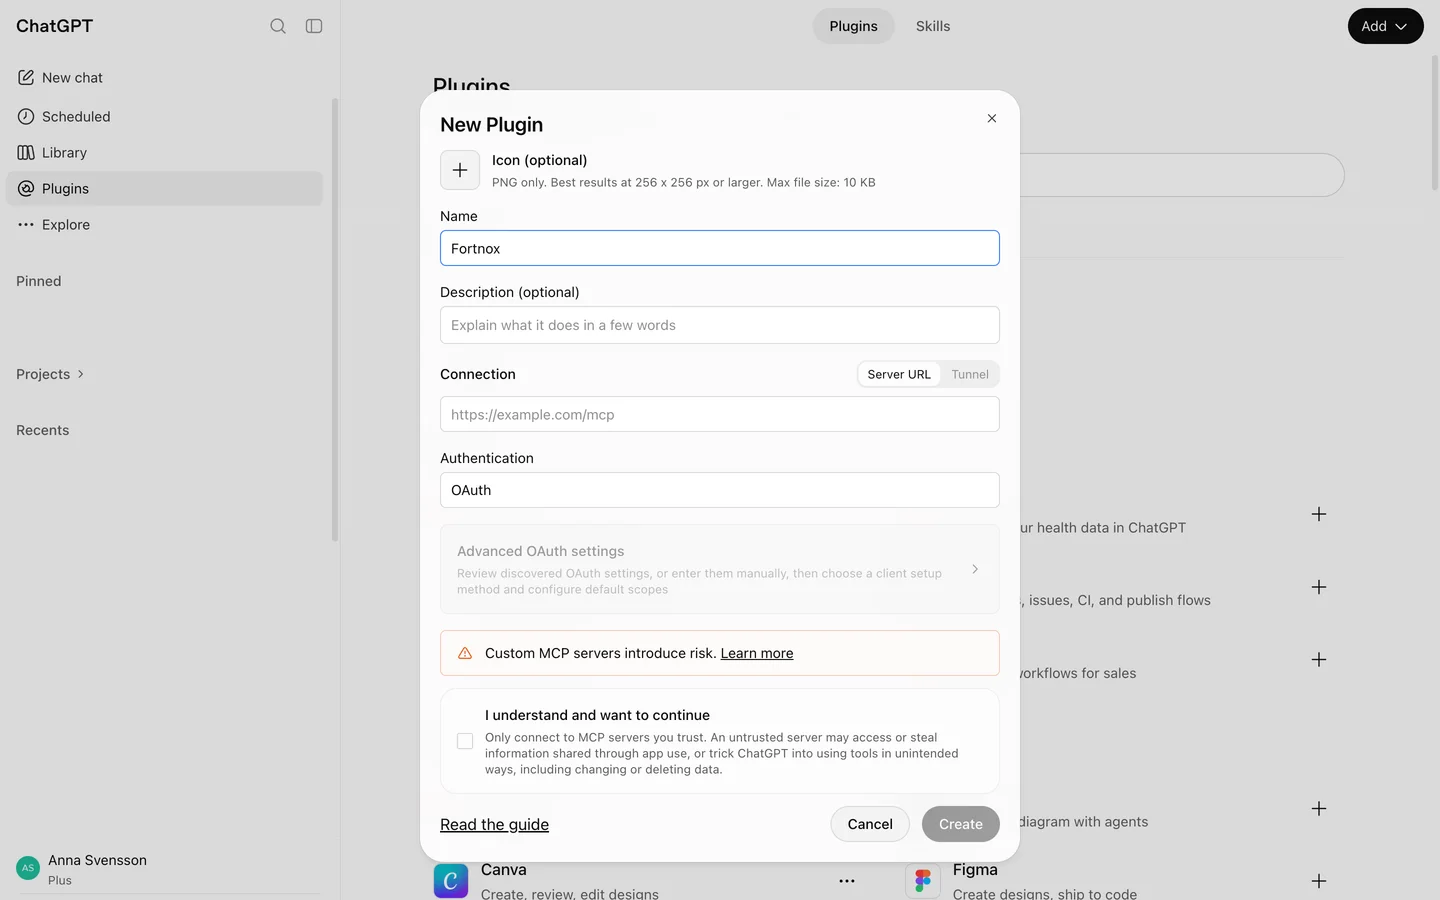
Stuck on this step?
Contact support about this step →Looks different on your screen?
Still stuck? Tell us which step and we will help you through it.
Step 6 of 8
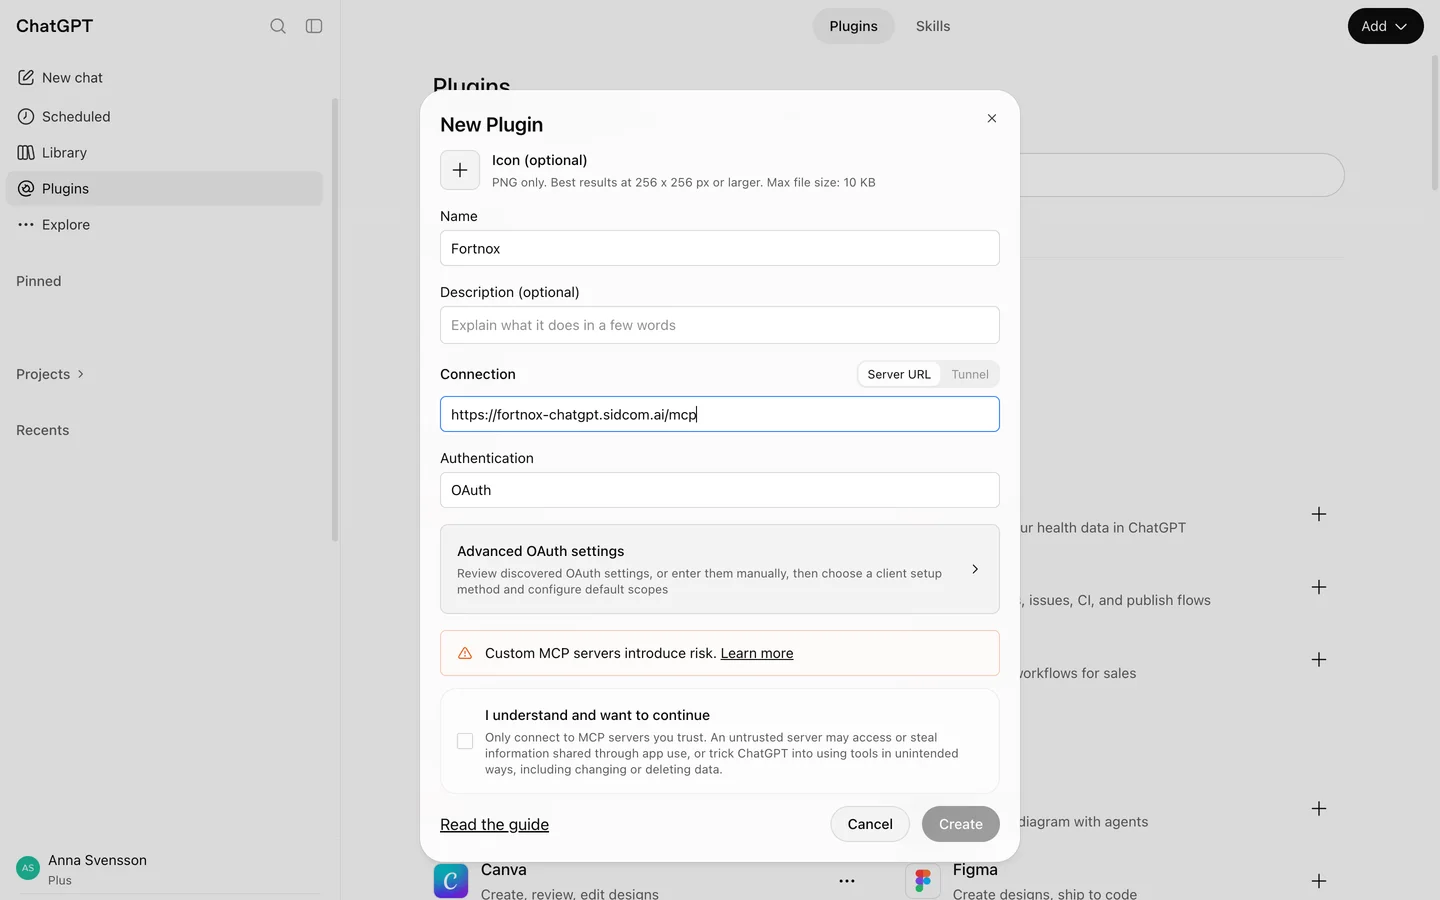
Leave Authentication on OAuth
That way you sign in to Fortnox with your own account. Nothing to change here.
Stuck on this step?
Contact support about this step →Looks different on your screen?
Still stuck? Tell us which step and we will help you through it.
Step 7 of 8
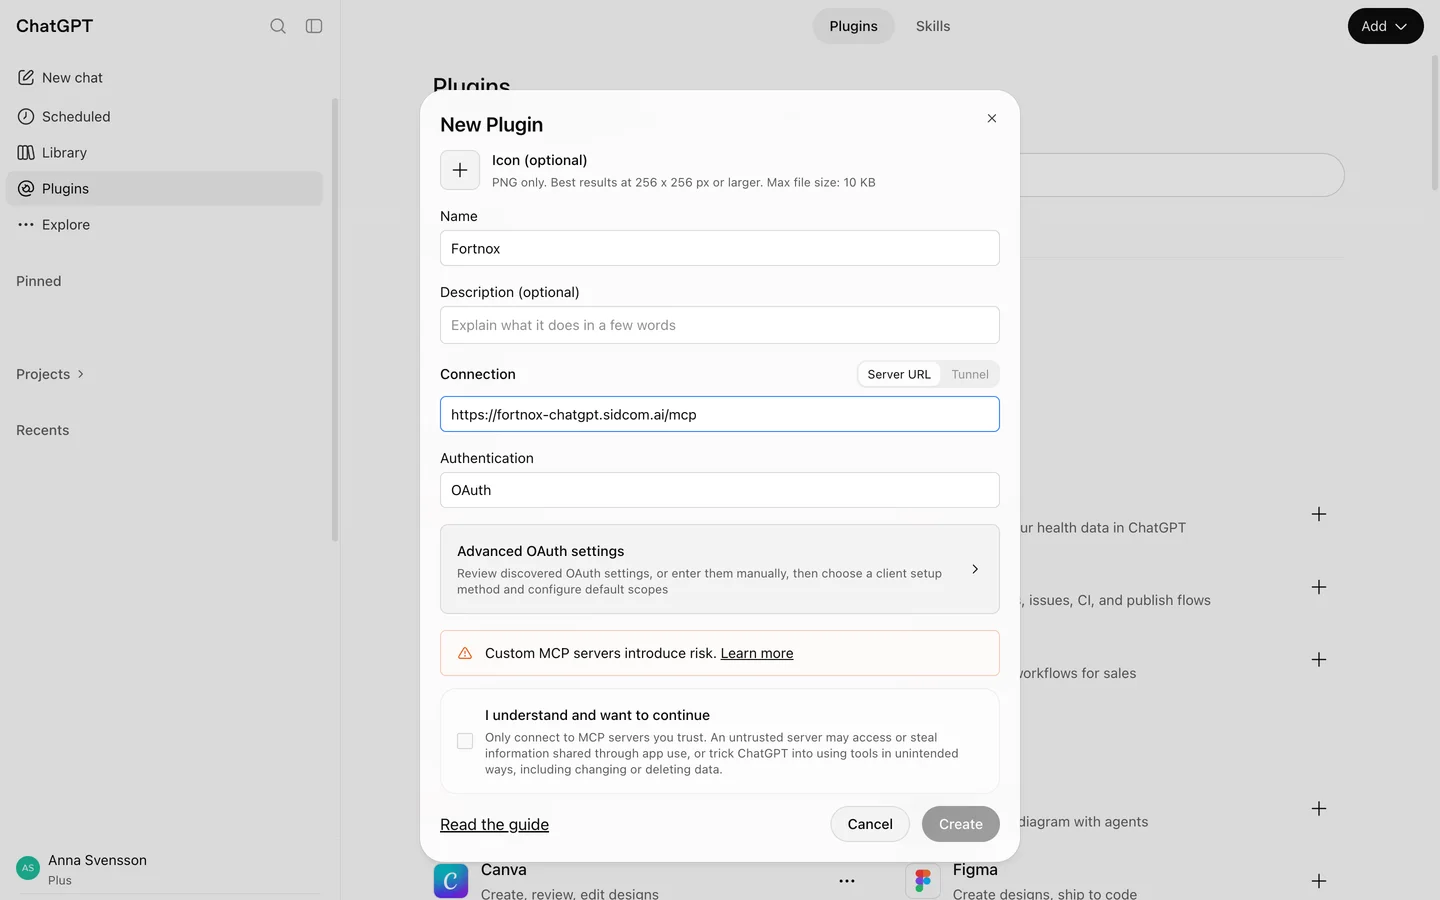
Confirm you understand
ChatGPT shows this warning for every custom MCP server. Tick the box to continue.
ClickI understand and want to continue
Stuck on this step?
Contact support about this step →Looks different on your screen?
Still stuck? Tell us which step and we will help you through it.
Step 8 of 8
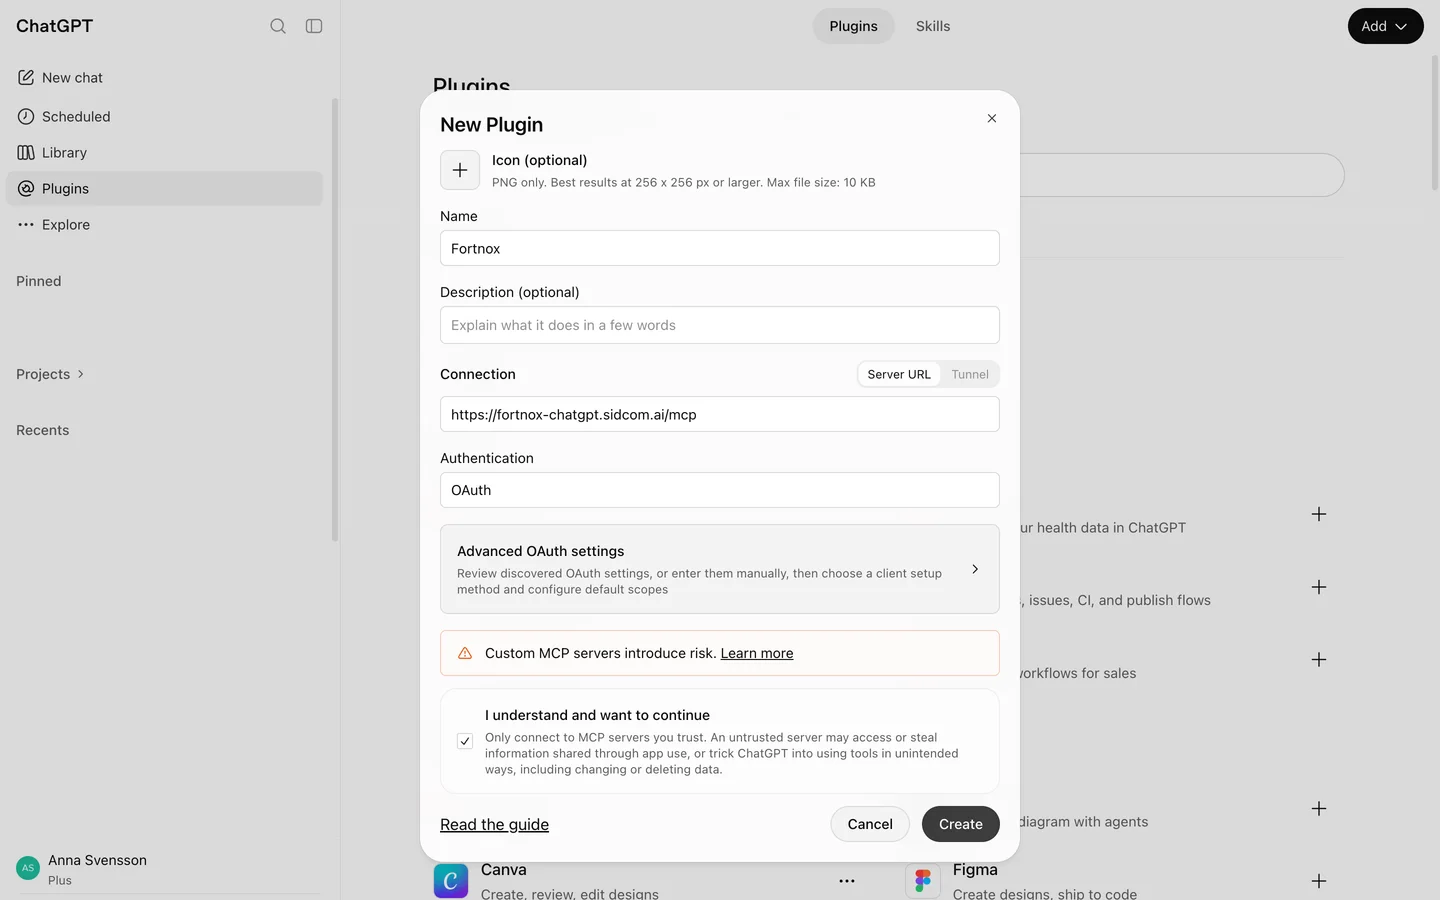
Click Create
ChatGPT checks the server and moves straight on to connecting it.
ClickCreate
It can take a few seconds while ChatGPT reaches the server.
Stuck on this step?
Contact support about this step →Looks different on your screen?
Still stuck? Tell us which step and we will help you through it.
Done
Fortnox is connected. Ask ChatGPT about your company.
Step 1 of 9
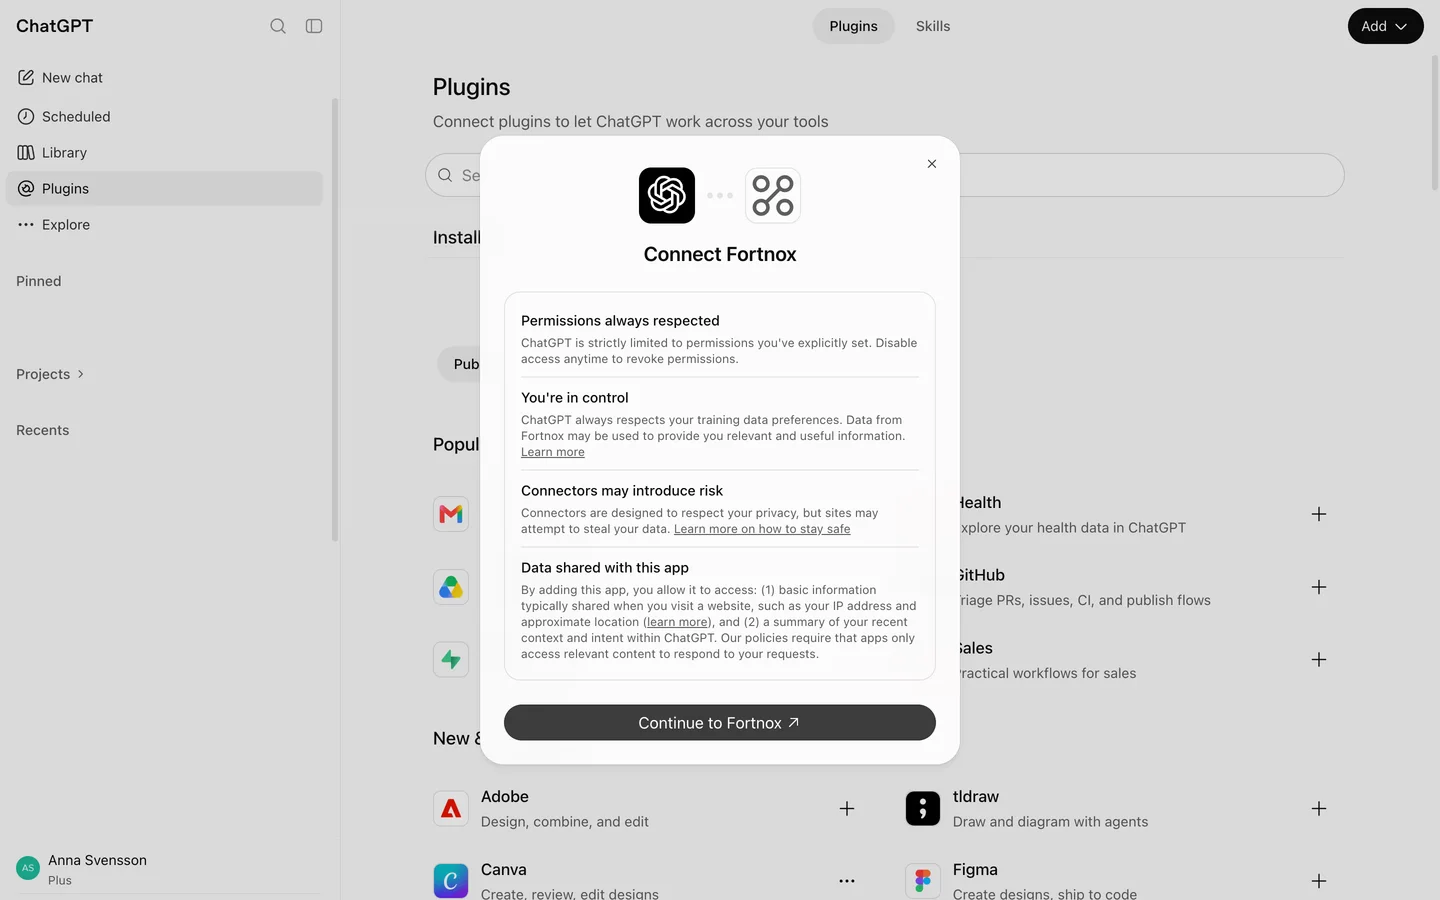
Continue to Fortnox
ChatGPT explains what the app may access. Continue to go to the sign in.
ClickContinue to Fortnox
Stuck on this step?
I closed this window by mistake
Open Plugins, click the Fortnox plugin and choose Continue connecting app. You pick up where you left off.
Contact support about this step →Looks different on your screen?
Still stuck? Tell us which step and we will help you through it.
Step 2 of 9
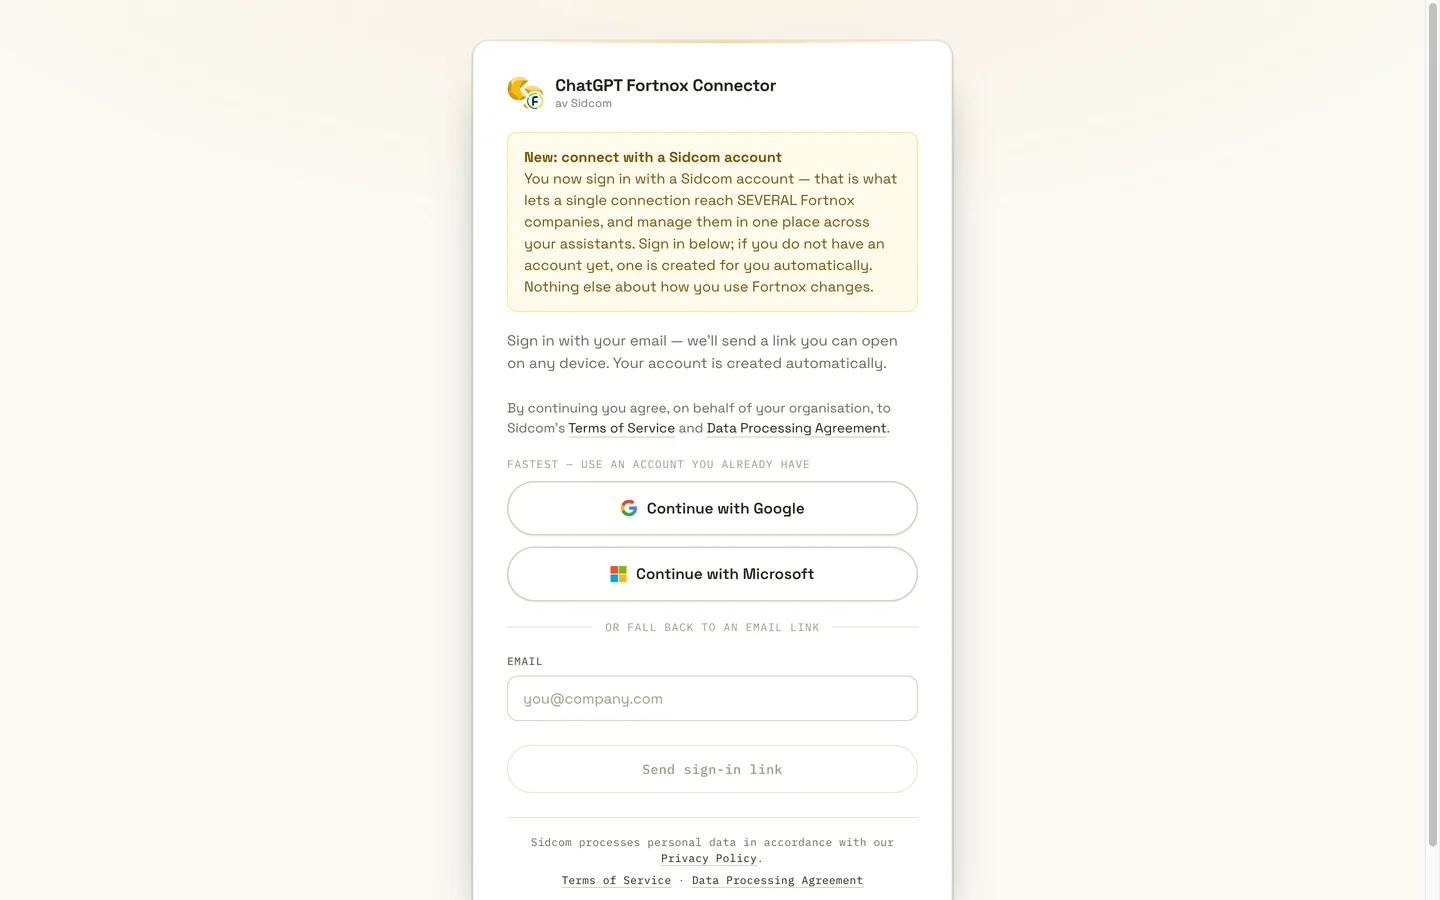
Sign in with a Sidcom account
Use Google or Microsoft, or get a sign in link by email. If you do not have an account yet, one is created for you.
ClickContinue with Google
One Sidcom account can reach several Fortnox companies, across your AI assistants.
Stuck on this step?
Contact support about this step →Looks different on your screen?
Still stuck? Tell us which step and we will help you through it.
Step 3 of 9
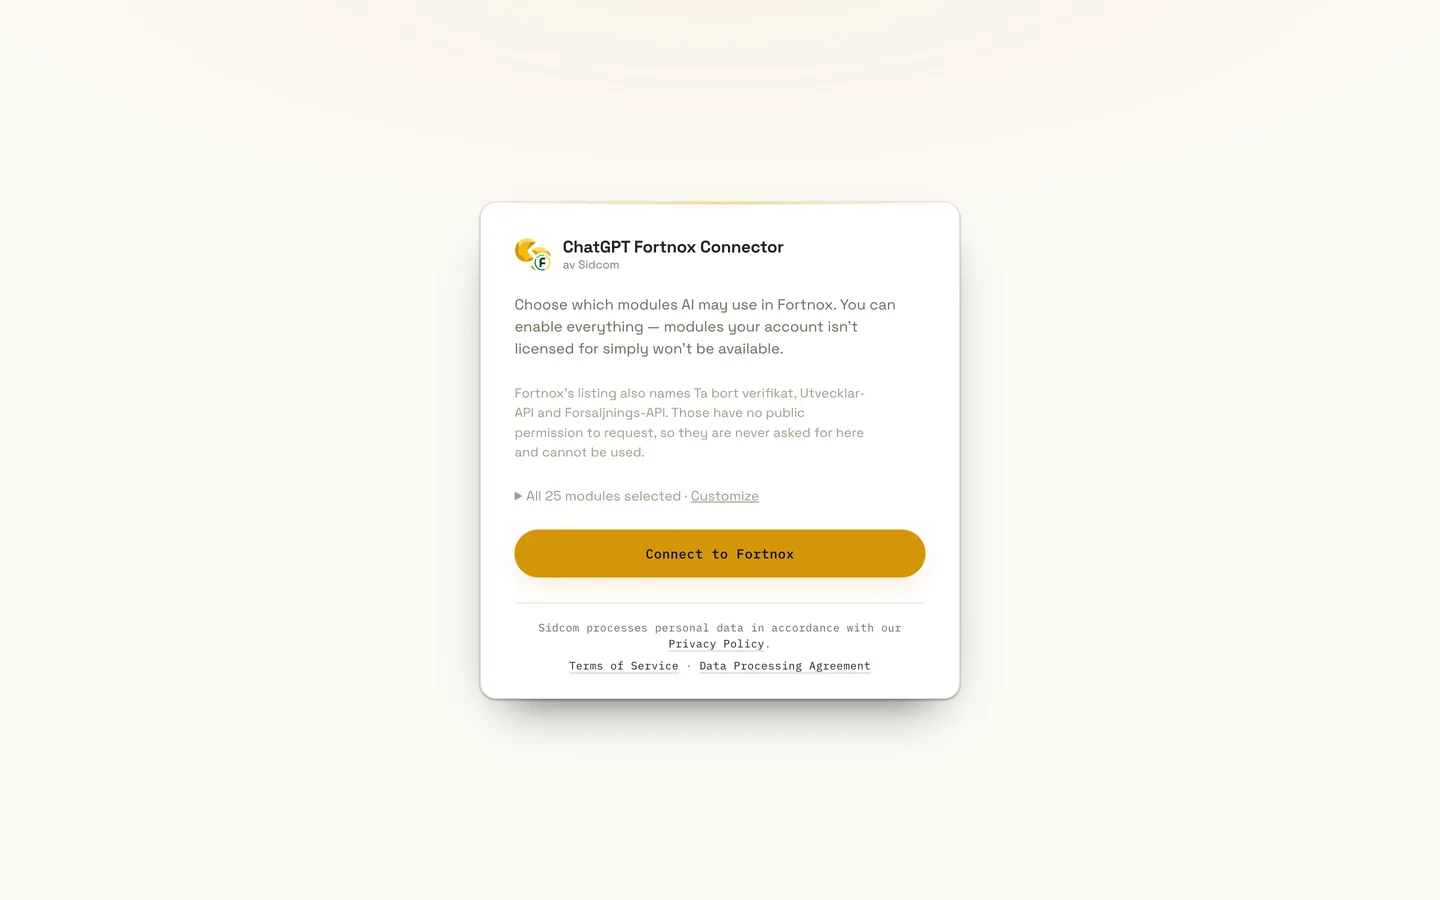
Choose modules and connect
Pick which parts of Fortnox ChatGPT may use. Leave them all on if you are unsure, modules the company has no licence for simply stay unavailable.
ClickConnect to Fortnox
Stuck on this step?
Contact support about this step →Looks different on your screen?
Still stuck? Tell us which step and we will help you through it.
Step 4 of 9
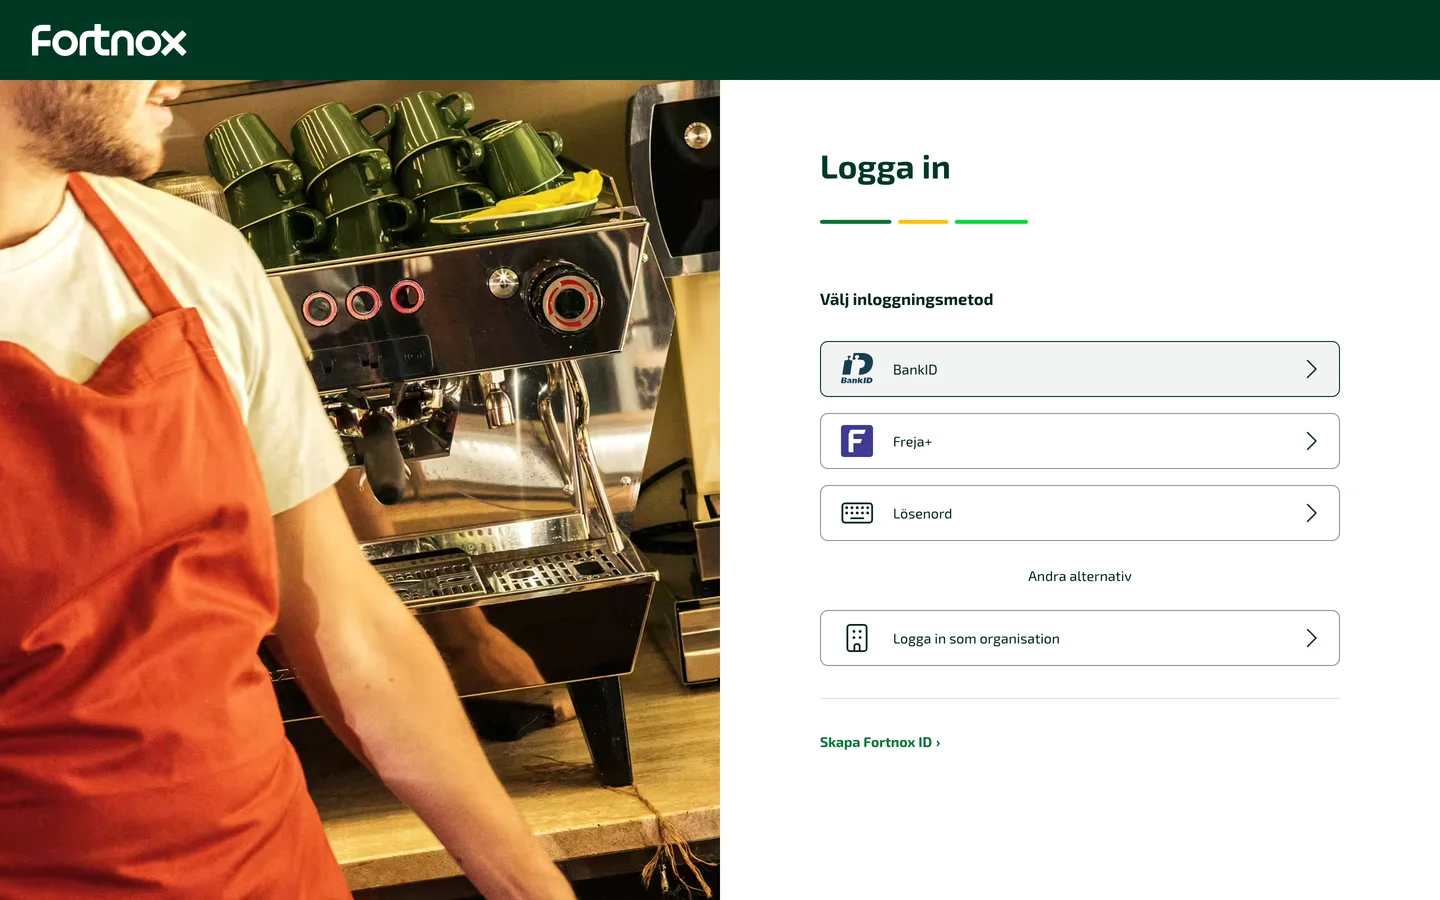
Sign in to Fortnox
Fortnox opens. Sign in the way you usually do, for example with BankID.
ClickBankID
Already signed in to Fortnox? Then this step is skipped.
Stuck on this step?
Contact support about this step →Looks different on your screen?
Still stuck? Tell us which step and we will help you through it.
Step 5 of 9
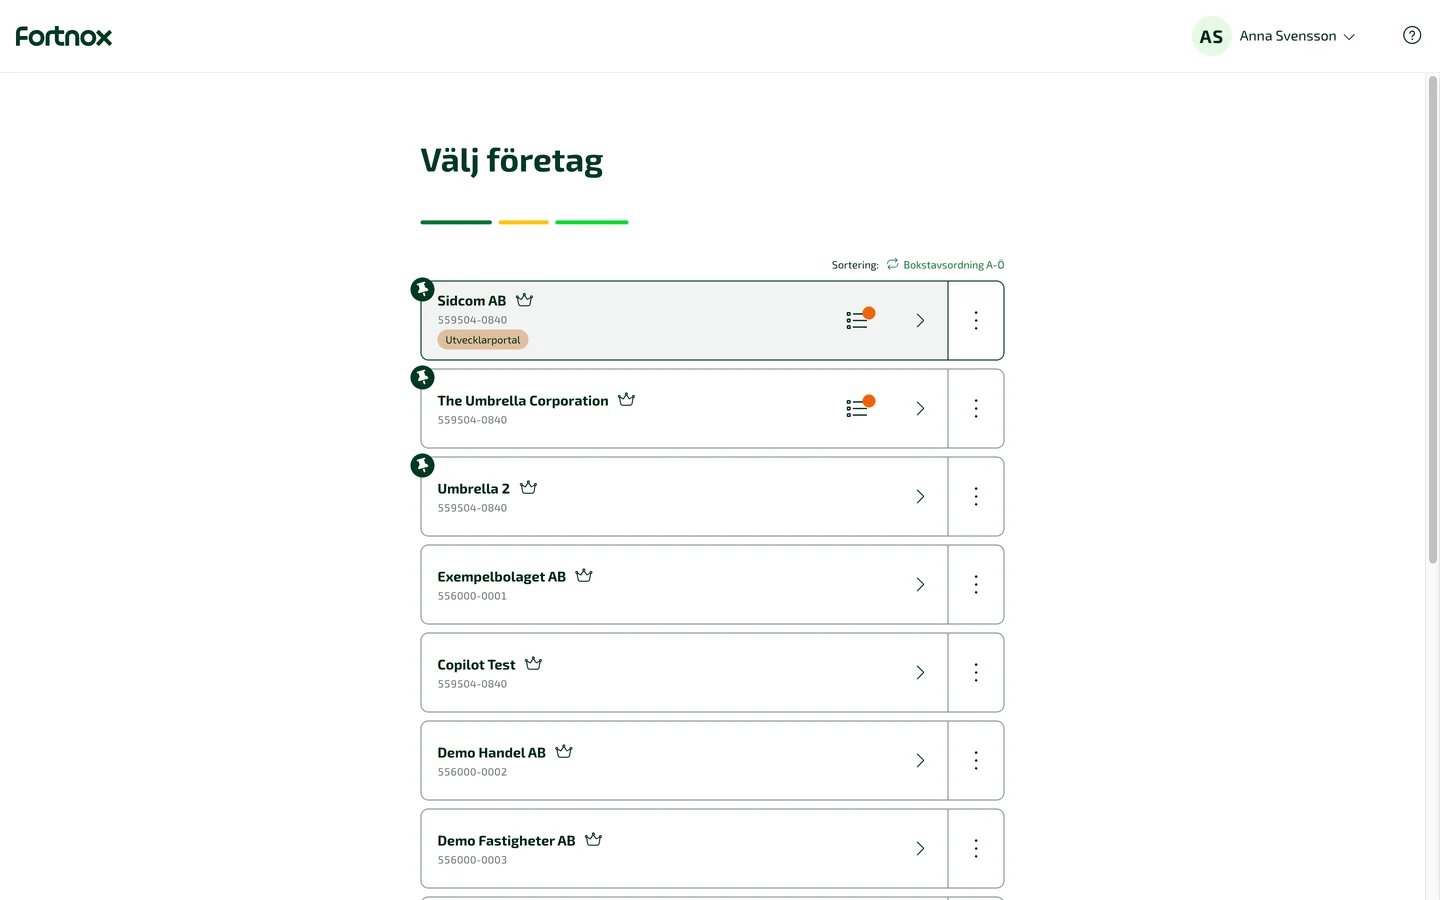
Choose the Fortnox company
Pick the company ChatGPT should work with. You can add more later.
ClickYour company
Have Digital Byrå? Then your company is listed twice. Choose the one that is not marked Digital Byrå, otherwise the licence is not found.
Stuck on this step?
It says the licence is missing
Check that you chose the company without the Digital Byrå mark, and that the company has a free licence. The licence is assigned automatically when you connect, but only if a seat is free. How to check for free licences and buy more.
It says my connection session timed out
If you picked a company that has not activated the ChatGPT Connector in Fortnox, activate it first in the Fortnox marketplace, then start again from ChatGPT. Otherwise the sign in took more than ten minutes: start again and it goes quicker the second time.
Contact support about this step →Looks different on your screen?
Still stuck? Tell us which step and we will help you through it.
Step 6 of 9
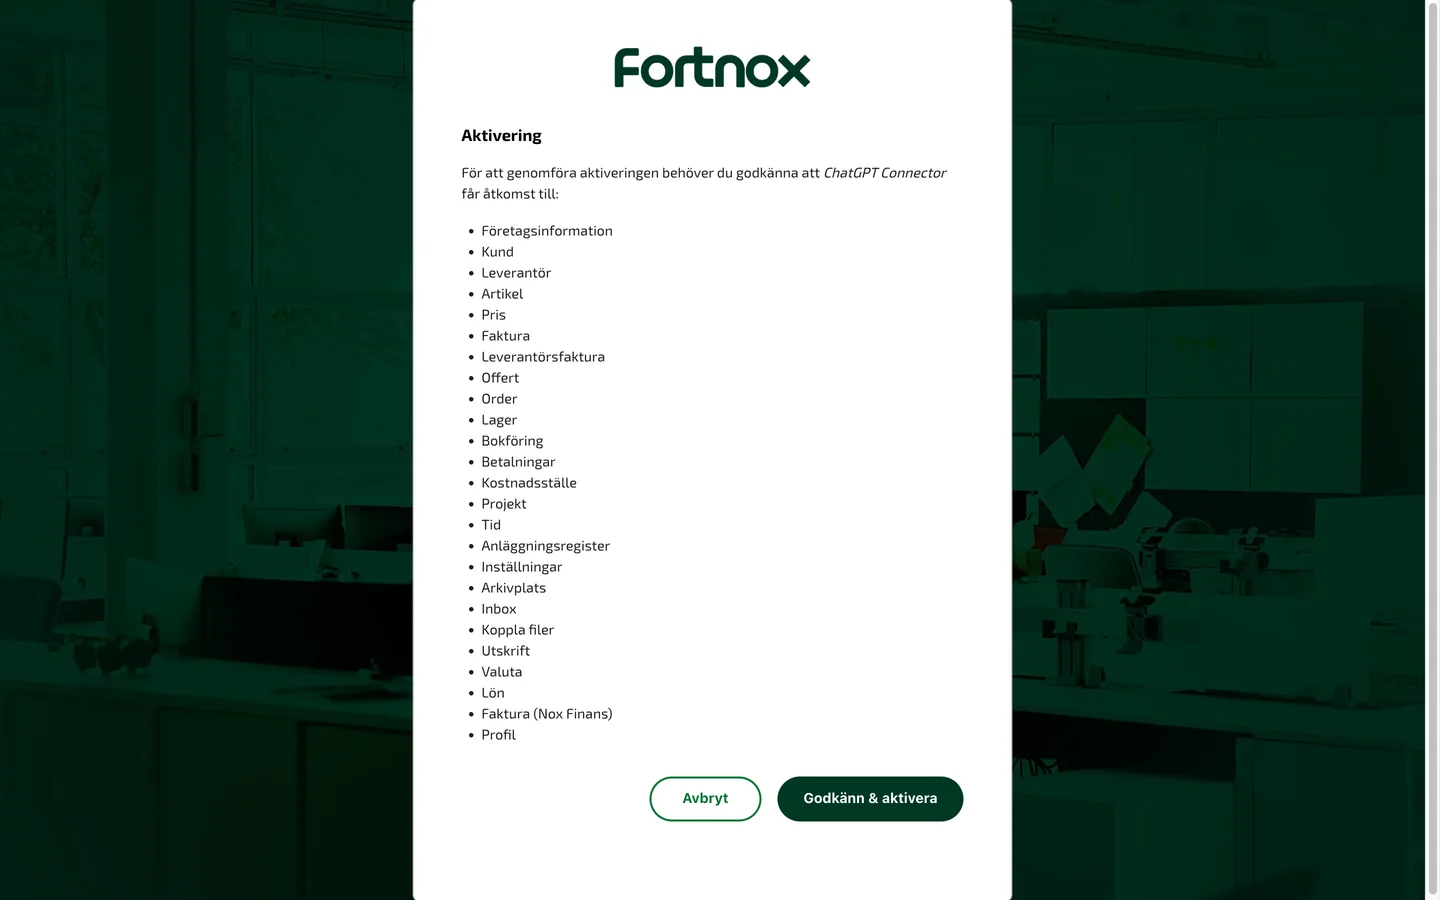
Approve access in Fortnox
Fortnox lists what the connector may use. What you can actually do is still limited by your own Fortnox user's permissions.
ClickGodkänn & aktivera
Stuck on this step?
Contact support about this step →Looks different on your screen?
Still stuck? Tell us which step and we will help you through it.
Step 7 of 9
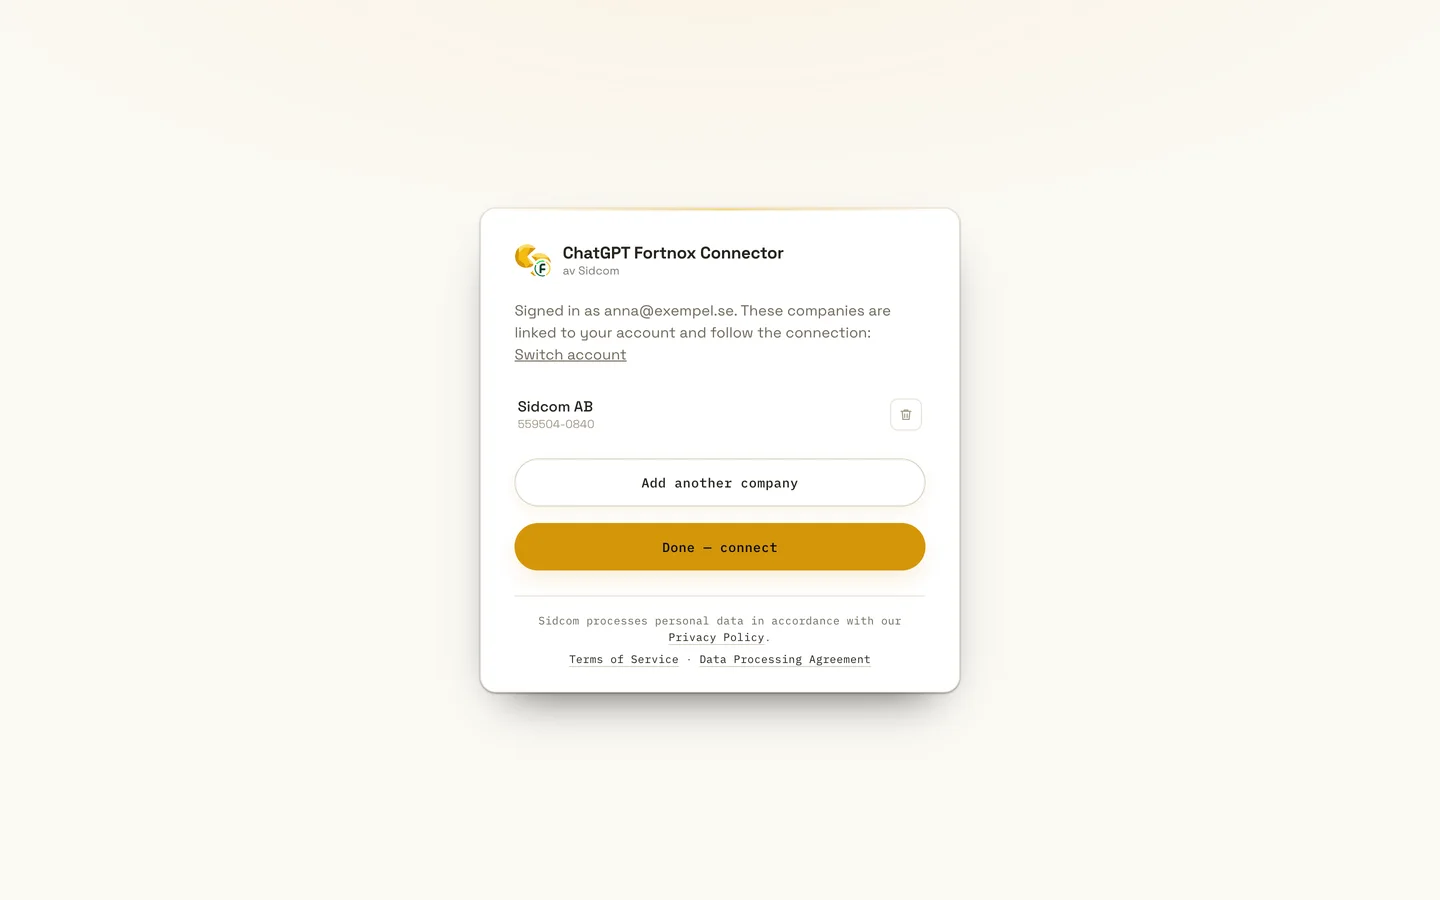
Click Done, connect
The company is now linked. Add more if you need to, then finish.
ClickDone, connect
Stuck on this step?
Contact support about this step →Looks different on your screen?
Still stuck? Tell us which step and we will help you through it.
Step 8 of 9
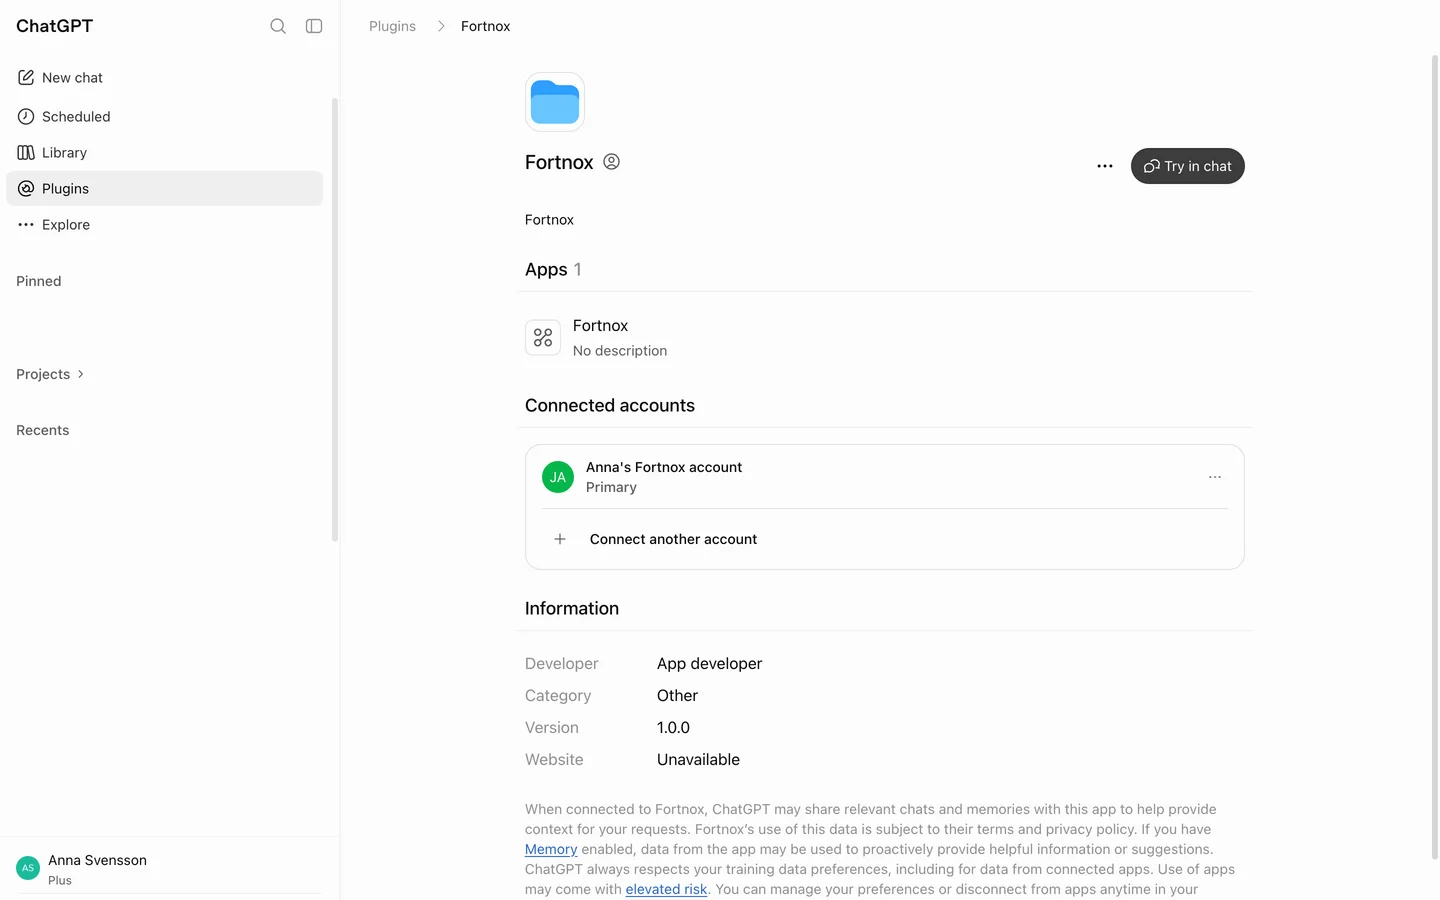
You are connected
Back in ChatGPT, the plugin shows your account under Connected accounts. Click Try in chat to start using it.
ClickTry in chat
Stuck on this step?
Contact support about this step →Looks different on your screen?
Still stuck? Tell us which step and we will help you through it.
Step 9 of 9
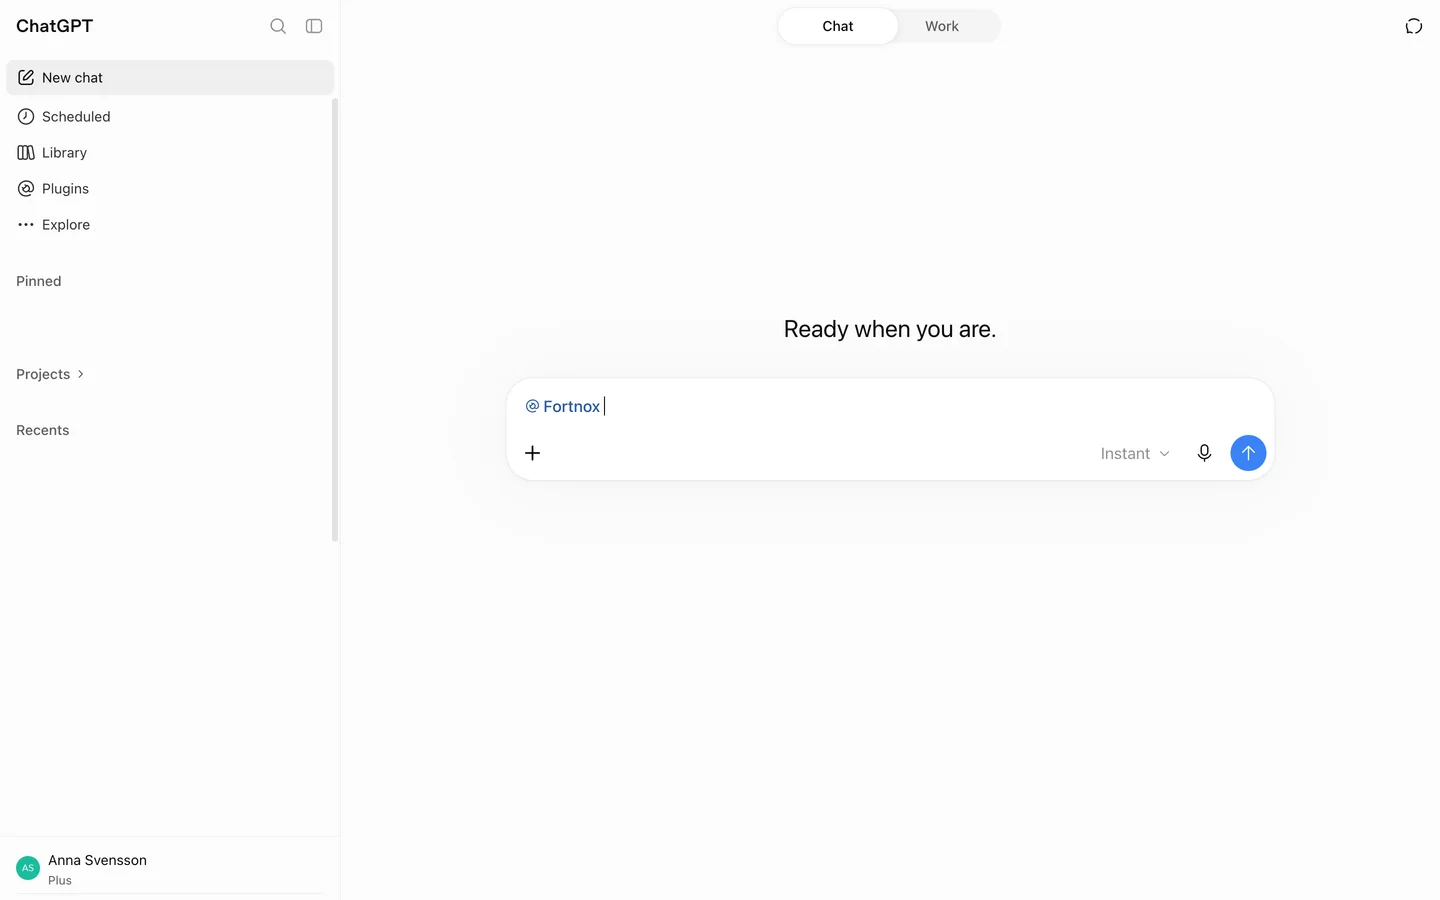
Ask about your company
Fortnox is selected in the chat. Ask something like What is the amount on my latest invoice? ChatGPT asks for your approval before anything is written to Fortnox.
Stuck on this step?
Contact support about this step →Looks different on your screen?
Still stuck? Tell us which step and we will help you through it.
ChatGPT updates its interface often. Screens last checked 29 Sept 2026.
// troubleshooting
Connection not working?
- 01
Have you bought and activated the licence?
You buy the licence in the Fortnox marketplace. Activate the connector on the company before you connect in ChatGPT. No separate integration licence is needed.
- 02
Do you have Digital Byrå?
Then your company is listed twice when you choose a company in Fortnox, with different agreement numbers. Choose the one that is not marked Digital Byrå. If you connect to the Digital Byrå version, the licence is not found.
- 03
Is there a free licence?
The licence is assigned automatically when you connect, but only if the company has a free seat. A new user connecting needs the company to have bought enough licences. If you land on the purchase page when reconnecting, the subscription is still there, the seat is taken. How to check for free licences and buy more.
- 04
Are you in the browser, on a paid plan?
The connector is added at chatgpt.com in the browser, on Plus, Pro, Business or Enterprise. It does not work in the free plan or in the ChatGPT app.
- 05
Did the connection time out, or does it drop?
Start again from ChatGPT, the Fortnox sign in needs to finish within ten minutes. If it drops with ERR_CONNECTION_RESET or TIMED_OUT, try another browser or your phone's hotspot, and temporarily turn off your antivirus' HTTPS scanning.
- 06
Is ChatGPT refused although the modules are selected?
The connector only reaches what your own Fortnox user has permission to. Ask your Fortnox administrator to grant the permission under Settings, Manage users. It takes effect right away, without reconnecting.